Since I’ve pretty much decided on putting the DS CPS2 Multi on the Horizontal Aero, I figured it’d need a 2P panel. It most likely won’t be permanent, but having the ability to swap it around is always handy.
Enter a 60 dollar Aliexpress repro…
![[IMG]](https://i.imgur.com/ZJeyMx2l.jpg)
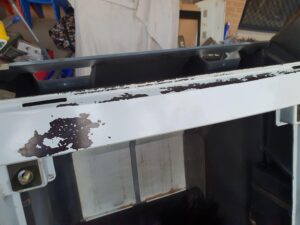
The post man delivered the Aero panel and I must say for the price, it’s usable
The buttons fit, the overlay is back printed on a thin perspex, the artwork looks solid – it doesn’t look like a scanned and blown up
![[IMG]](https://i.imgur.com/d0yJja2l.jpg)
![[IMG]](https://i.imgur.com/pcDYWdRl.jpg)
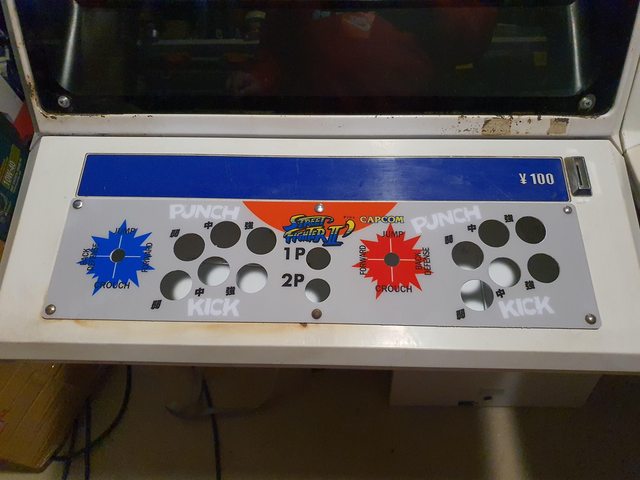
The back looks and feels powder coated in white with the typical sanwa mount
![[IMG]](https://i.imgur.com/thz2eQSl.jpg)
The one caveat is, the overlay doesn’t have the carriage bolt holes cutout correctly, it’s way too small
![[IMG]](https://i.imgur.com/hpOtzsll.jpg)
The panel itself has the correct size, but the overlay doesn’t
![[IMG]](https://i.imgur.com/32v9u3sl.jpg)
Carriage bolt fits on properly from the bottom. Nothing major, I will just drill gently so it doesn’t crack the overlay
![[IMG]](https://i.imgur.com/mor0mzql.jpg)
However, after a proper test fit, I found I needed to drill out out a bigger hole than what it came with. I totally forgot about the carriage bolts having that square piece. She’s all good! And she fits!
For the price I paid, I honestly can’t complain. I wrote it off before I purchased it thinking it was going to be rubbish, but I’m surprised with how well it’s turned out. I would take this over a rusty CP (that i’d have to restore) any day of the week. Of course, if you wish to pay a premium, there’s alberto and Raf, but this will work especially for those that aren’t too fussy
Was purchased from here: https://www.aliexpress.com/item/1005004102674938.html?spm=a2g0o.order_list.0.0.24bc1802tGCrvH
Now it’s all about wiring the buttons and JLF as it came stock with a Semitsu. I took out the original and trusty multi meter to identify the wiring schematics, 30 mins in, I looked at the Aero City Manual online and also found the wiring schematics (RTFM/Facepalm moment).
![[IMG]](https://i.imgur.com/6vfXn2jl.jpg)
Fortunately for me, I had the correct molex connectors except for the 3 way which is now in transit, but I have something I can use as an interim.
An hour and a bit later, we’ve got a JLF and 3 button harness setup!
![[IMG]](https://i.imgur.com/ESs6N2Sl.jpg)
A quick test had me stumped as only the “up” input was registering when I hit left – on both harnesses, so I obviously had my wiring incorrect.
After reading the wiring guide again, I realised I had placed the wires based on the bottom left instead of the way it should be wired. I went yellow, green, red, orange, black instead of black, green, yellow, orange, red – yep! another facepalm moment 😀
I’ve done these almost over a hundred times and I’ve still screwed it up. Fortunately for me, the JST NH pins are easy enough to take out without damaging anything, so a quick change around and all is well!
![[IMG]](https://i.imgur.com/ymEy3GBh.jpg)
The last challenge was the kick harness! I didn’t realise, but the Aero city hasn’t got any pass through cabling for kick harnesses. Every single cab I’ve ever owned has kick harnesses installed, so it was time to build one in the same logic as my Astro city – it’s a 3 part thing. The kick harness from the game board to the pass through, the pass through kick harness and then the pass through to the actual buttons. Sure I could’ve just made it one component, but I figured I’d do it like the way all other cabs are, even though it takes a little longer (and by little, I mean A LOT :D)
![[IMG]](https://i.imgur.com/xkSQEmnl.jpg)
Top right = molex to molex pass through (the same purpose as the 10 way in the astros)
The middle = molex to te amp converter (so I don’t have to do a cps2 to molex, since I’ve already got cps2 to te amp)
The bottom = molex pass through to buttons
After installing all that wire (about 20m of it), cable ties are a persons best friend – here’s the best I could wire manage it.
![[IMG]](https://i.imgur.com/FluNV5Yl.jpg)
Grabbed together whatever spare sticks/buttons I could find to test (will eventually buy some brand new ones) and to my delight, the kicks work first go!
![[IMG]](https://i.imgur.com/IHRQqqVl.jpg)