I came across a post from h2hcabs on IG where they connected a Wii to New VS City cabs.
This got my brain thinking how and how cool it would be to utilise the 480p on the NNC to run a Wii with the “better” version of Tatsunoko Vs Capcom
Here’s the original IG post from h2hcabs
I previously converted the arcade Mario Party Carnival to TvC in this post
After seeing h2hcabs’ post, I figured why not try it out myself. A Wii is so cheap plus I already had a couple of Wii’s at home.
The biggest challenge was to get component to VGA as the Wii doesn’t have a native VGA solution. Enter this amazing product from wakabavideo which was recommended by h2hcabs.
Before doing anything on the NNC, I needed to ensure the Wii I had was functional and after watching the tutorial below on YouTube, the Wii was softmodded and both the Homebrew Channel and USB Loader GX worked perfectly
Next stop was to get the unit on the NNC. Wiring it up is pretty self explanatory, USB C for power, VGA and component cables to the converter. Connect the Wii as you normally would and fire it up.
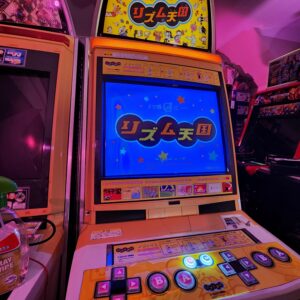
To my surprise, the process was seamless and I got an image immediately
Now that audio and video was working, the next step was to figure out how I was going to get the controls to work.
I had a generic SNES classic controller that used the same connection as the classic controller which was tested and found to be operational. Great! It had 6 buttons and start which is all I needed for the arcade panel.
Let’s open her up and see what we’re working with.
Grabbed the multimeter and got to work, figured out which were the active lines and the ground points. This particular pcb already had specific points outside of the button area which made it a lot easier. I wired this up in a way
Refer to Arcade Otaku Wiki Sega New Net City for reference
Initial testing was positive, so I did the same thing for a second player
If you noticed the extension cables in the above pic, it’s because I wanted a way to have the pcbs inside the control panel and then the connection for the Wii Remote outside so I can plug in the controller classic controller externally and unplug the remote when I need to use it for navigation. I routed the extension cable down the side of the cabinet where all the cables go, check this spaghetti of wires! Don’t worry, I know what I’m doing 😀
Since the Wii can’t be operated without the Wii Remote. I needed to figure out how to have the sensor bar accessible for navigation, the logical location is above the monitor. I was able to route the bar and cable down from above the bezel to make it look as “OEM” as possible
You wouldn’t even know it was there if you didn’t know 😀
The final step was powering on the Wii when the cabinet turned on. This was an easy process as I purchased a mutli voltage PSU (100-240v) and wired it directly to the cab so when it turns on, the Wii also has power.
I’ve now got a fully functional Wii (and Gamecube) setup on the NNC! This setup gives me proper 480p, arcade controls and also normal OEM controls. I won’t be playing normal games like Wii Sports where the sensor bar is required as that’s only there purely for navigation, the space where this cabinet is located is limited and is definitely not designed for games using the sensor bar 🙂
Before anyone asks, why would I do such a thing to arcade cabinets? The biggest reason is I don’t have the space for a dedicated “retro console” area where I can get a nice PVM and have all the consoles setup nicely, I much prefer having arcade cabs, so this is the happy medium 😀